The Bogey Golfer © Course Guides
Ord Golf Club Overview
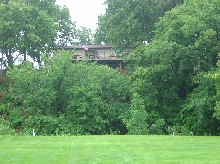
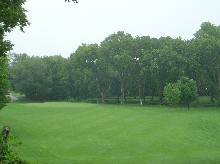
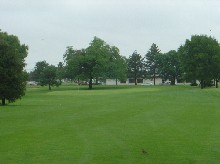
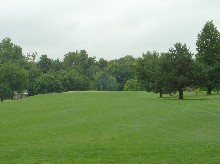
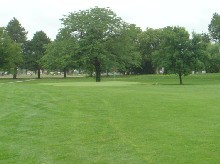
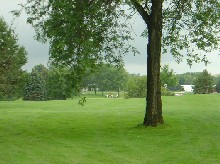
The town of Ord, Nebraska, is a prototypical small town in Middle America, complete with a town square, a hardware store, a couple of mom-and-pop restaurants, a handful of bars, a farm implement dealer or two, and several churches. The Ord Golf Club looks like (and maybe is) an extension of the citys park system, which is located next door. The grass is lush and green, the trees are huge and healthy, and the creek which winds around the edge of the course probably has kids swinging across it on ropes when grownups arent looking. Ord is located in the north central part of the state, about 50 miles off the interstate. While the golf couse wouldnt justify going this far out of your way just to play, its a shady, enjoyable course, in a friendly midwestern town.
Ord Golf Club is a nine hole course, with a par of 33 (three par 3s, no par 5s). Nine holes cost $10, eighteen are $15 (two laps). The course is 2390 yards (4780 for two laps). Its short enough that you never need your driver. Obviously, its fun to try and reach the green on the short par 4s, but look around at the adjacent fairways, greens and tee boxes before you let fly - if you miss, something is going to be in play (tight quarters here).
As a general guideline, the greens are mostly defended by tall trees, and false fronts (and sides, and backs). Land a little too close to the edge, and the ball will roll right off. Get your short game tuned up if you want to score well here!
|
Ord Golf Club - Detail
Hole #1 is a 207 yard par 3. The tee is elevated, giving you a nice look at the hole, and the creek which crosses in front of the teebox, and wraps around to the right of the hole. The green is dome-shaped on the left side, which makes approach shots from there difficult. Favor the right side of the hole. Landing short is better than landing long.
Hole #2 is a short par 4, which requires accuracy off the tee. The fairway passes dangerously close to the #9 teebox on the left, so check to see if anybody is up there before you tee off. The green is very interesting, having a ridge across the front and left which will NOT hold a ball, no matter how smartly struck. Two schools of thought here: Let the ball collect in front of the green and chip up on your third shot, or play it long and/or right, and try for a two-putt.
Hole #3 is another short par 4 - at only 264 yards, big hitters can carry the green. However, its another place where accuracy is at a premium. The green is long and skinny, with false sides on both the left and right. So if you hit it to either side of the green, its very difficult to make your chip shot stay on the green. Far better to be short and straight! A tee shot of 220 yards will land you on the flat spot in front of the green, well-positioned for your approach shot. Hit the right tee shot, and its an easy par. Hit the wrong one, and youll struggle to make double-bogey.
Hole #4 is a ho-hum 293 yard par 4. Theres a pond on the left, and an irrigation canal on the right (not to mention a street that marks the boundary of the course). But theres plenty of room in the middle of the fairway, and two mid irons will be enough to reach the green in two. There are bunkers both left and right, so lay up if youre not confident in hitting your approach shot straight.
Hole #5 is another 293 yard par 4. It sets up pretty wide-open, inviting you to pull out the driver. However, look around to check for traffic coming up the street on the right, and also look around to see if there are people on either the second green or the third tee box, both of which will be in play if you hit a wild shot. The green has a false side on the left, so try to stay right as you set up your approach shot.
Hole #6 is the most challenging hole on the course. At 384 yards, its certainly the longest one. However, theres also a creek that crosses the fairway right where a well-hit drive wants to land, so your approach to this hole requires some planning. A big hitter can carry the creek, but this is probably not a realistic strategy for the bogey golfer. The marker on the tee box says 232 to reach the creek. However, theres also a hill leading down to the creek (with a flat spot at the bottom of the hill). So if your tee shot catches the downslope, it could propel you forward more than youd expect, and land you in the creek. If you dont get to the bottom of the hill, the marker at the top of the hill says you still have 192 yards to the pin. The green sits up at the top of another hill. There are a whole bunch of trees protecting the left side of the fairway once youre over the creek (because hole #7 comes right back down that same hill). Oh by the way, a fairly busy highway runs down the right side of the hole, so make sure you wait for traffic before you tee off. The Bogey Golfer strategy here is: Feel good about a bogey. Hit a 180 to 200 yard tee shot to the top of the hill (where the 192 yard marker is). Stay in the middle of the fairway (you dont need to be trying to dig the ball out of the rough as youre clearing the creek). Play a short iron or mid iron shot over the creek to the middle of the fairway at the bottom of the hill leading up to the green. Play a high wedge shot into the middle of the green. If youre going to miss, miss left so you have some green to work with, even if the pin is left. Take your bogey and move on.
Hole #7 is a 166 yard par 3 with an elevated tee box. The course is a little bit cramped over in this corner, so watch for people on the #8 teebox on the right, and also people playing the #6 fairway on the left. Normally, I back off two clubs when hitting from this high up. However, for some reason, Im always short on this hole, even when it feels like I get a good hit. But short is better than long, since that same creek you had to deal with on #6 winds in behind the green.
Hole #8 is a 152 yard par 3. Its more difficult than #7 because the green is uphill from the tee box, and the pathway through the trees feels kind of narrow. Take one extra club (maybe even two), and swing easy through the ball to get plenty of altitude. (I always top it when I swing hard). Pay attention to the #9 tee box, since its in play on this hole (be prepared to yell Fore! if you stray right).
Hole #9 is a 296 yard par 3. Its a little bit narrow off the tee (trees on both sides), but it widens out generously into the fairway. Theres room enough to use your driver, but no real need to - a straight mid-iron shot will still let you hit a short iron or wedge into the green. Hitting long into the green leaves a difficult chip back onto the green since because of a steep roll-off. (Plus you're flirting with that same creek which is pretty close to the back of the green.)
This is a short course with lots of opportunities for a bogey golfer to make pars, if you hit straight and play conservatively. Greens are well-defended if you spray your approach shots, and you can roll up big numbers in a hurry. Bogey is a good score on number 6.
|