HiMark White Course Detail
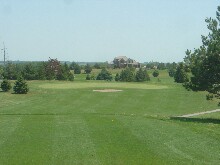
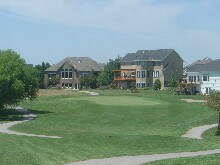
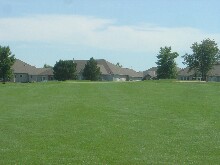
White #1 This is a creampuff opening hole. It's straightaway, wide open, and not that long. Driver-wedge is the play here -- take what the course offers! Bomb it down the fairway, and stay out of the traps!
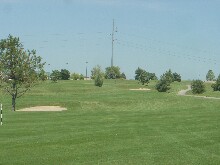
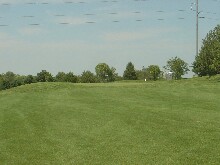
White #2 is one of the shorter par threes on the course. However, pay close attention to the pin placement here. There is three or four clubs difference from the front to the back. Nominally it plays 100 yards from the Varsity tees. If the pin is back it can easily play 130. Also, don't get confused about which green you're aiming at. It's easy to mistake Red #4 for your target -- White #2 goes RIGHT of the first green, not left...
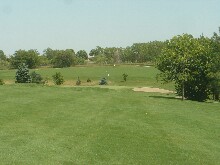
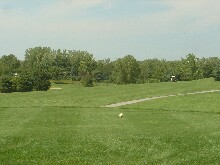
White #3 is up the hill behind the second green. It's a bit narrower than #1, and bit longer (it's 394 yards). You tee off up a slight rise, from where you can't see the green. Basically it's a straightaway hole, so just steer it up the middle. There's a lone bunker on the front right of the green.
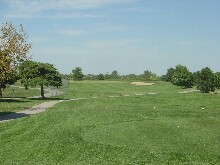
White #4 is your first par 5. Interestingly enough, the stone tee marker is misprinted, labeling it a 528 yard par 4 (don't panic). The tee shot is over a pond, but the carry isn't too bad -- 140 in the air will easily carry. The rest of the hole is uphill, so you do want some distance off the tee here, and driver is certainly warranted. There are trees right, and OB left, so don't overswing... For your second shot, you'll be wanting to hit a fairway wood or a long iron because of the hill. Two solid shots should set up an easy approach to a flat green.
White #5 is a long (407 yards) downhill par 4. The tee shot lands on a fairway which slopes left to right, so make sure you favor the left side. If you get too far right, your approach shot will get blocked out by a stand of tall leafy trees.
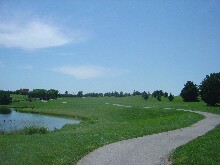
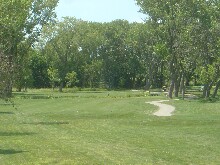
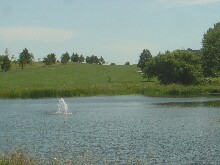
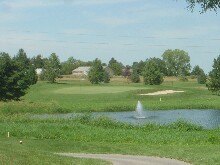
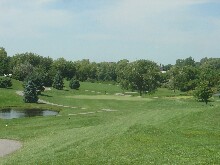
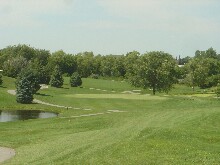
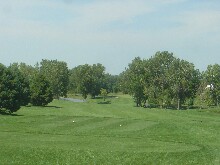
White #6 is a par 3 over the lake. It's pretty as a postcard, with a fountain thrown in for visual appeal, but beware all the trouble on the right. Take dead aim at the flag, and stay in the swing. If you're a bit short, there's a bunker to deal with, but that's certainly not the worst thing that can happen to you...
White #7 goes back across the lake, which narrows down to a stream from this angle. The hole takes a pronounced dogleg right, and the creek crosses back across the fairway from your landing area. The whole trick here is figuring how much of an angle to take across the creek. Too little, and you set up a long carry and a very long second shot up the hill to the green. Too much and you flirt with landing in the junk. The hole plays 484 yards in total, which is short by par 5 standards. However, because of the two forced carries, getting home in two is a chancy proposition. Play it for three shots, and it's a very straightforward hole.
White #8 is a straightaway par 4, playing about 370 yards. Pretty much anything you hit in the fairway is going to leave you with an easy approach. Watch the pin placement, because the green has two tiers (upper tier in back).
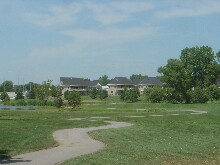
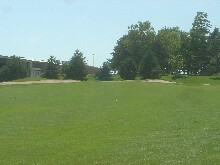
White #9 heads back up the hill toward the clubhouse. From the tee, the fairway looks intimidating because it's uphill, but the hill really comes into play on the second shot -- you're going to get about your normal distance off the tee -- just use an extra club on the second shot. So at 350 yards, it's basically pretty short, and you can hit anything you want from the tee.
HiMark Red Course Detail
The Red course opens with a long 192-yard par 3. There are bunkers left and right, so obviously the bail-out is short. Stay out of the traps and you'll be fine.
Red #2 is a real tasty challenge. It's a little bit downhill off the tee, with a pronounced dogleg left. At 404 yards, you want as much distance as possible off the tee, especially because of the pond fronting the green. However, if you hit your driver, and you spray it the least bit right, you can easily run out of fairway, and roll into the rough. And if you hit a fairway wood and don't get exactly the right line, then you could easily wind up with a 200 yard shot over that pond (yeesh!) necessitating a layup. Great hole -- needs both strategy and execution!
Red #3 is a really short par 4, playing a scant 298 yards. There's OB on the left side of the hole, so you need to exercise a little bit of care. However, there's not much to this hole, so just hit anything straight, like a five or six iron off the tee, and leave yourself a wedge for an approach shot.
Red #4 is a downhill 200 yard par 3. There's a pond on the left to be mindful of, but plenty of room to miss right (so long as you don't stray so far as to get into the trees...).
Red #5 is a puzzler if you've never played the course before. You can't see the green because there's an exaggerated dogleg to the left. It's only 300 yards total, so again, hit a five or six iron, favor the left hand side of the fairway, and you'll be able to attack the pin on your approach shot. There are big bunkers fronting this green on both the left and right. This green is deceptively deep, so watch pin placements carefully.
Red #6 is a gorgeous par 5. The tee shot is a bit narrow, so you might want to consider a fairway wood instead of a driver. The fairway narrows down between a pond on the left and a grove of trees on the right, setting up an approach shot uphill to a receptive green. It's only 472 yards, so big hitters can realistically go after this with hopes of a birdie or eagle.
Red #7 comes back up the hill. Playing 341 only yards, even the hill doesn't manage to put any teeth in this hole. Get your tee shot in the fairway, and this one can be had.
Red #8 has a bit more challenge. It's a hundred yards longer to start with. It's a bit narrower (trees on both sides). And finally, the green is tucked back in a corner, elevated up from a swale. The best line into the green is from the right side of the fairway. Another great hole!
The last hole on the Red course is another short (449 yards) par 5. It's a little bit uphill, but frankly, it's only 2 yards longer than the par 4 eighth... There is a pond on the right side that you need to be aware of because it's not readily visible from the tee (all you can see are the cattails and hazard stakes). The fairway is plenty wide enough to hit driver, so go ahead -- treat yourself to a birdie!
HiMark Blue Course Detail
The Blue course opens with a slightly downhill 176 yard par 3. There's an annoying little bunker centered up exactly in front of the green. Take plenty of club, and plan to fly over the cursed thing!
Blue #2 is a 404 yard par 4, straightaway. There has been some recent remodeling at this course, and there's a "leftover" green to the left side of the fairway -- ignore it -- the true target is straightaway. There's room enough for your driver if you're hitting it well. However there is a fairway bunker near the 150 yard marker on the right.
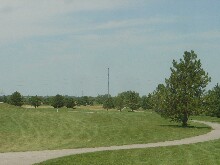
Blue #3 is a par 5. It has a confusing look from the tee because of some trees that look like they're in the fairway but really aren't. There's an aiming stake in the middle of the fairway to help you out. There's also a giant power pole in the distance right of the aiming stake. Hit your driver -- this fairway is actually very wide, so take advantage of it! Your approach shot will require some thought. There's a bunker fronting the green on the right. If you're close enough to challenge the pin in two without running afoul of that bunker, go for it! Otherwise you can lay up for an easy par.
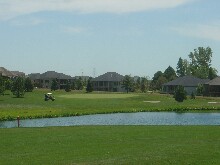
Blue #4 is a super-short par 5, playing only 440 yards. The reason why they annointed it as a par 5 (not a very good reason, frankly) is that there's a pond in front of the green. You can't reach the lake off the tee (well, I couldn't, anyway), and the fairway is generously wide. Take your best shot! If you get any kind of a tee shot, you're set up to take a long iron into the green. I hit my four iron fat and dumped my shot in the middle of the lake. A better play might have been to hit a six iron over the pond, which would easily have cleared the lake even if it was short of the green. Anyway, despite the lake, this hole really ought to be a par 4.
Blue #5 is a 195 yard par 3. Watch the tee markers, however. The day I played it was set up to about 165, which is way different. There's plenty of room to bail out right and short, but don't miss left!!
Blue #6 is a masterpiece of evil genius. There is a creek that crosses the fairway about 180 yards from the tee, and then winds down the right side of the fairway and alongside the green. The hole is overhung with trees on both sides, and has a severe dogleg to the right. So your options are limited. Your tee shot either needs to lay up short of the creek, or travel 220 yards, mostly in the air. (Too much further and you run out of fairway, too much less and you're wet). The second shot gets really ticklish. The green is slightly elevated, which means it won't hold a low running shot (and there's a sheer dropoff into the canal on the right), and the overhanging trees make it problematic to land a high soft shot if you're not coming in from the perfect angle (right center over the creek). I splashed my approach into the canal...
Blue #7 is another short par 4, but not quite so evil. Again it's only 328 yards, and there's a pond in front of the green to keep you from hitting driver. Aim at the stake, which is about 100 yards from the green. A 200 yard tee shot is fine. Much longer is trouble. If you spray it left, you're in the pond, if you spray it right you're in a bunker. Take what the course gives you, and hit a 200 yard tee shot followed by a wedge over the pond. By the way, the pond is fronted by vertical railroad ties, so make sure you get plenty of carry!
Blue #8 is a 174 yard par 3, framed by two big trees off the tee. Nothing special here -- aim at the pin and swing through it.
The last hole on the Blue course is the third par five, and it also is pretty short (472 yards), although it is uphill a fair amount. It takes a big dogleg to the left, and the corner is cuttable if you hit a pure shot. If it's not pure, you're going to get hung up in the trees. Or you can play three mediocre shots and get to the green comfortably. The fairway is split as you're playing your second shot, with the left half being the "high road" and the right half being the "low road". Either side is fine, just make sure you get a good reading on your yardage for your final approach to the green.
|